

How To Make Text Transparent In Photoshop And Retain The Edges
Lesson x: Doing More with Layers
/en/photoshopbasics/sharpening-and-dissonance-reduction/content/
Introduction
As we discussed in our lesson on understanding layers, there are many ways to apply layers in Photoshop. And then far, we've covered a few fundamental skills, including how to use aligning layers. In this lesson, we'll cover some of the more advanced options, similar opacity, blending modes, layer masks, and layer groups. We'll also provide links to additional resource if you want to acquire more about using these tools.
If you'd similar to follow along, you lot tin can download our example file.
Layer opacity
Yous can command the opacity for almost every layer in a Photoshop document. The opacity determines how transparent or opaque the layer will be. In other words, it controls how much the layers below can show through. Take a wait at the example below.
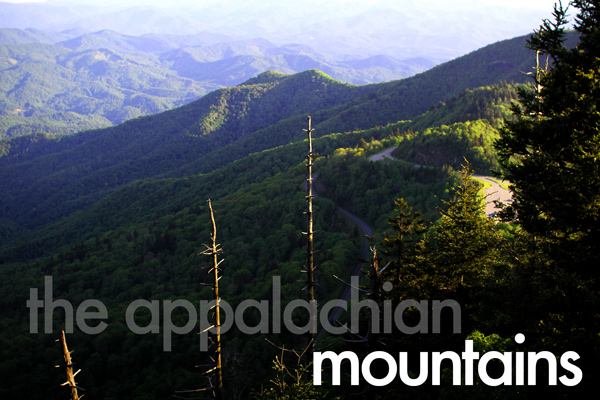
This example uses ii different Text layers and a Background layer. The mountains text layer has an opacity of 100%. This layer is completely opaque, meaning zip below the letters tin show through. By dissimilarity, the appalachian text layer has an opacity of 15%. This layer is mostly transparent, meaning you can see through the letters to the background layer.
Yous can too change the opacity of an Adjustment layer to make it more subtle. For example, if yous have a Curves layer that is too intense, you could reduce the opacity to seventy-80%. In many situations, this may be easier than modifying the adjustment layer itself.
To adjust layer opacity:
- Select the desired layer, then click the Opacity drib-down arrow at the top of the Layers panel.
- Click and drag the slider to arrange the opacity. You'll see the layer opacity alter in the document window every bit you lot move the slider. If y'all fix the opacity to 0%, the layer volition become completely transparent, or invisible.
Endeavor this!
Open the case file, then adjust the opacity of the Text layers to encounter the effect.
Groundwork transparency
By default, most Photoshop documents use a Background layer. Yous cannot adjust the opacity of a Groundwork layer, and it cannot be hidden. This is because you won't want the groundwork to take transparency for almost projects, especially if y'all're working with a photo.
Yet, at that place are some situations where you may want a transparent background. If y'all're creating a logo for a website, for example, a transparent background will allow the website's background color to testify through, giving the logo a more seamless and professional await.
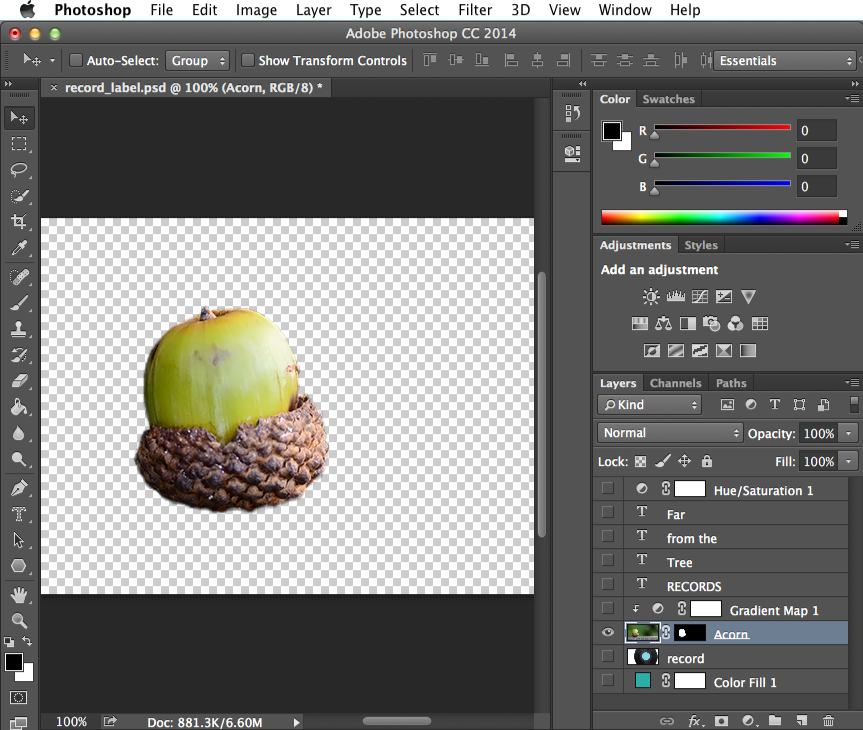
If yous're post-obit along with the example file, endeavor hiding all layers except the Acorn layer. Meet the checkerboard pattern backside the acorn? This ways the groundwork is completely transparent. The checkerboard won't actually be exported when you lot save your image; it's only in that location to indicate transparency.
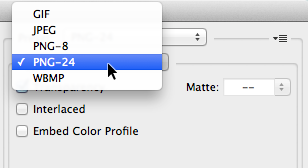
Note that if yous want your paradigm to have a transparent background, you'll demand to save it in a format that can handle transparency. We recommend using the PNG-24 format, which is available in the Save for Spider web dialog box. JPEG files are unable to have transparent backgrounds, then they will salvage all transparent areas every bit white.
Blending modes
In add-on to adjusting opacity, you can apply different blending modes to control how the layers in your certificate are mixed together. The blending mode menu is located at the peak of the Layers panel, side by side to Opacity.
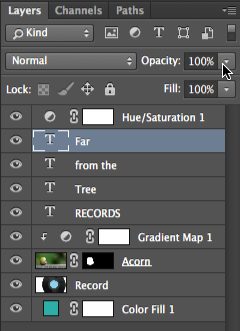
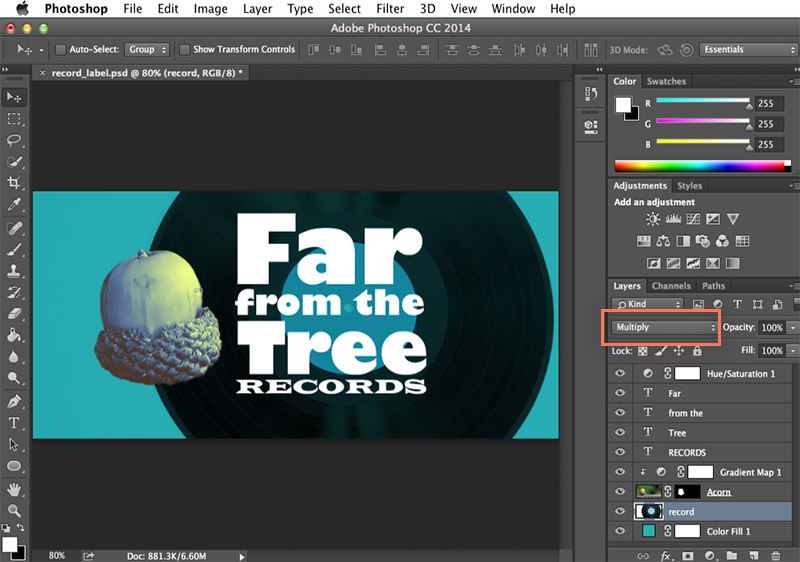
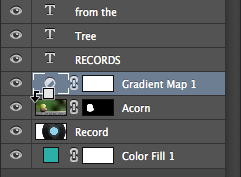
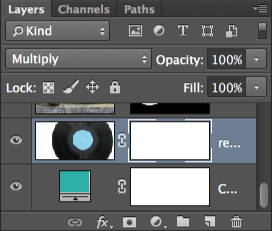
If you're post-obit along with the example file, select the Record layer. Observe that the blending mode is set to Multiply. Even though the opacity of the Record layer is set to 100%, this blending manner allows the turquoise color from the layer below to testify through.
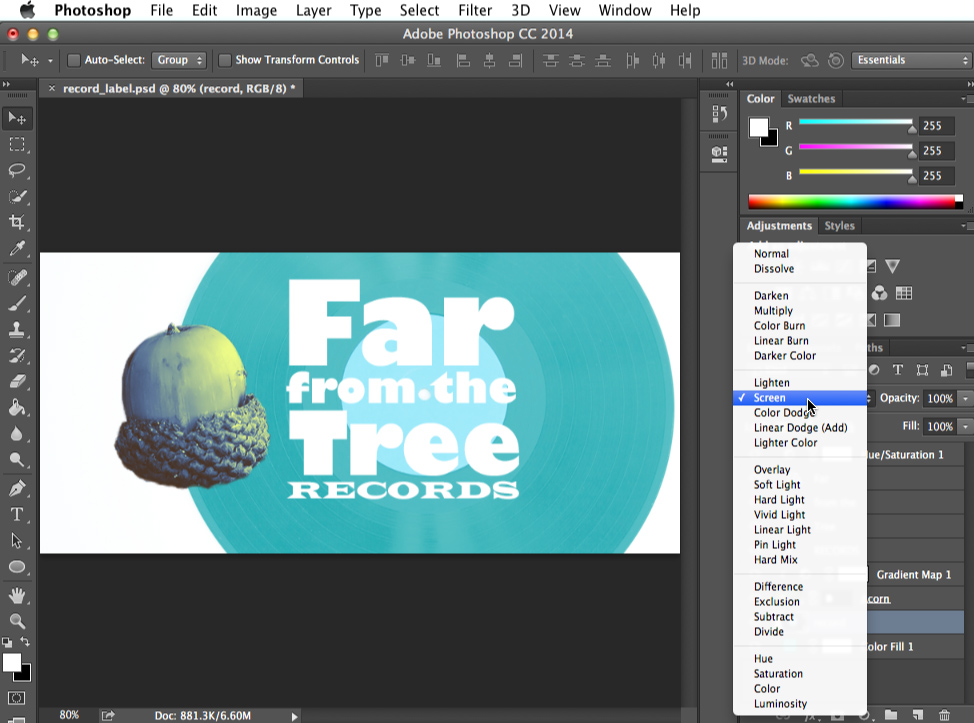
To change the blending mode, click the Blending Mode drop-down menu, then select the desired mode. In the example below, changing the blending mode to Screen will still allow the turquoise background to show through, but this fourth dimension it appears on the record instead.
Each blending way creates a different effect, and some are much more noticeable than others. Information technology'due south likewise important to note that blending modes will work differently depending on the content of your layers. This ways many blending modes may wait unnatural, and information technology'due south unlikely that all of the modes will look good in your project.
While blending modes requite you a lot of flexibility, they tin can also exist tricky to use. To learn more than about blending modes, review this tutorial from Photo Blog Stop.
Clipping masks
Earlier in this tutorial, we covered using adjustment layers to correct images. By default, adjustment layers will affect all layers below them. Even so, in that location may be times when you just want an adjustment layer to affect one layer. To exercise this, yous can use a clipping mask.
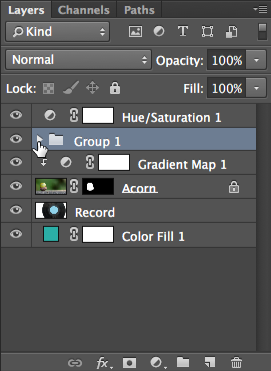
If you lot're following forth with the example file, locate the minor pointer next to the Slope Map layer. This indicates that a clipping mask has been applied, which limits the adjustment layer to just the Acorn layer below.
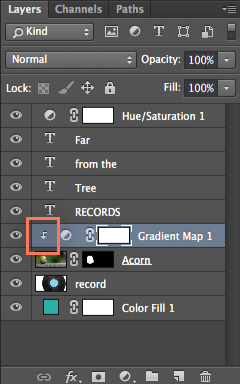
To apply a clipping mask, press and agree the Alt key on your keyboard (or Pick on a Mac), then click betwixt the desired layers in the Layers panel. In this example, we're clicking between the Slope Map and Acorn layers.
You tin can also apply this method to release a clipping mask. Releasing a clipping mask does non delete the layer, but information technology causes it to behave like a normal layer. For example, if you release the clipping mask for the Gradient Map layer in the example file, it will touch the color of all of the layers below it instead of only affecting the Acorn layer.
It's also important to annotation that you tin can apply a clipping mask to multiple adjustment layers above the same layer. For this reason, if you're already using clipping masks in your certificate, new adjustment layers may use a clipping mask automatically.
Endeavour this!
Open the example file. Select the Acorn layer, then add a Curves adjustment layer. Make sure a clipping mask is applied to the new layer, then modify the curves in the Backdrop panel. Discover how the curves adjustments simply touch the Acorn layer. Next, endeavour reducing the opacity of the adjustment layers to 70%.
To learn more than about clipping masks, review this tutorial from Adobe.
Layer masks
Sometimes you may want only certain parts of a layer to exist visible. For example, y'all might want to remove the groundwork from a layer and so the layers below it can testify through. While yous could use the Eraser tool to remove the parts you don't want, this type of destructive editing may be difficult to undo. Fortunately, layer masks let you to prove and hide parts of any layer in a nondestructive way.
Creating a layer mask can be a scrap complicated, so let'due south start past looking at one that'southward already finished. If you're following forth with the case file, select the Acorn layer. Hither, we used a layer mask to hide, or mask out, the background so the acorn is the only part of the layer that'south visible. The layer mask is represented by the blackness-and-white thumbnail to the correct of the layer icon in the Layers panel. Find how the areas that are visible in the certificate window correspond with the white area on the layer mask thumbnail.
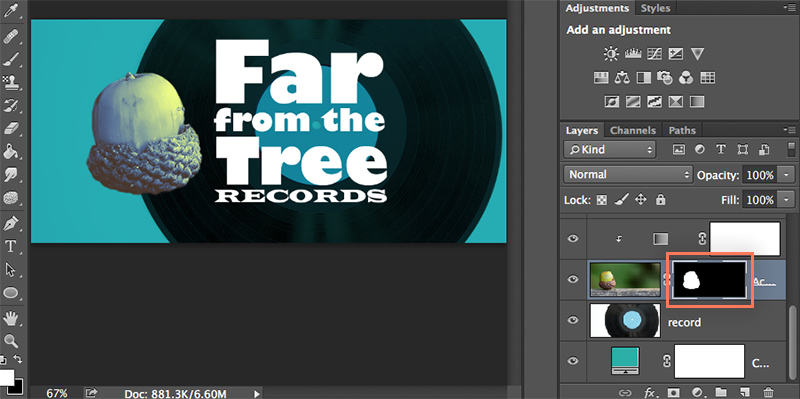
The of import matter to recognize here is that the background of the Acorn layer hasn't actually been removed; it's just hidden. If we ever wanted to show more of the original prototype, we could edit or even remove the layer mask.
To edit a layer mask:
To meliorate sympathise how layer masks work, allow'due south try editing the the Acorn layer mask. We'll be using the Brush tool, so if yous've never used it nosotros recommend reviewing our lesson on working with brushes.
- Select the layer mask thumbnail in the Layers panel. In our example, we'll select the thumbnail next to the Acorn layer.
- Adjacent, choose the Brush tool from the Tools panel, then set the Foreground Color to white.
- Click and drag your image to reveal areas in the layer. In this example, we're revealing more of the background by adding white paint to the layer mask.

- Gear up the Foreground Color to black, then click and drag your image to hibernate areas in the layer.
- Continue using the Brush tool until you're satisfied with the result.
You'll need to have your time and piece of work carefully to get the best possible result, specially when refining the edges of the layer mask around an object. It may exist helpful to adjust the size, hardness, and opacity of the Brush tool.
To create a new layer mask:
Now that you know more nearly layer masks, you lot may desire to try creating your own.
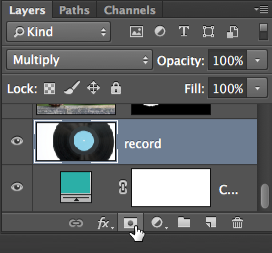
- Select a layer, and so click the Layer Mask button at the bottom of the Layers panel. In our example, we'll create a new layer mask for the record layer.
- The layer mask will appear as a white thumbnail adjacent to the layer icon in the Layers panel. Yous tin then select the thumbnail and use the Castor tool to edit the layer mask.
Note that you tin can apply multiple layer masks to the same layer. However, this tin go complicated, so nosotros recommend using only i layer mask per layer.
Using layer masks with aligning layers
Yous tin can utilise a layer mask to command which areas of your image are affected past an adjustment layer. For example, if you have a Black and White adjustment layer, you could use a layer mask to convert specific areas to black and white while leaving other areas unaffected.
Every adjustment layer has a layer mask past default, and so you lot won't need to create a new one. You tin only click the layer mask and then utilize the Brush tool to edit it.
To remove a layer mask:
- Click and elevate the layer mask thumbnail to the Trash Tin in the lower-right corner of the Layers console.
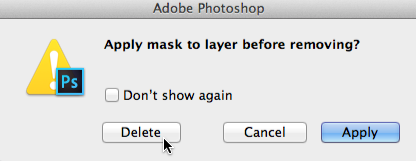
- A dialog box will appear. Choose Delete to remove the layer mask. Choosing Apply volition actually remove the parts of the layer that are currently hidden, so you'll want to avoid this choice unless yous're absolutely certain that you no longer demand these parts of the image.
You lot can also press and hold the Shift key and click the thumbnail to temporarily disable the layer mask.
Creating and editing layer masks can exist a challenging task, and at that place are many other methods for achieving skilful results. To larn more, review these tutorials:
- Mask Out Part of an Prototype (Adobe)
- A Consummate Beginner's Guide to Masking in Photoshop (Design Shack)
Layer groups
Once you start working with multiple layers in your document, it tin can be difficult to go on them organized. Fortunately, Photoshop allows yous to group your layers. Yous can use groups to keep related layers together, move and edit multiple layers at one time, and much more.
To create a grouping:
- Locate and select the Grouping button at the bottom of the Layers panel.

- A new empty group will appear. If you desire, click and drag the group to reorder it within the Layers console.
- Click and drag any layer to the group icon in the Layers panel, so release the mouse. Layers that are in a group will be slightly indented from the other layers in the panel.

- Click the arrow to collapse or expand the layer.
- You can now dispense all of the layers in the group at once. In this example, we're clicking the eye icon to hide all layers within the grouping.
If you're using Photoshop Elements, you won't exist able to create new groups. Still, y'all will be able to view existing groups when working with files created in the full version of Photoshop.
Try this!
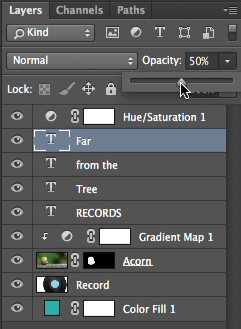
Open the example file and create a group. Click and drag all of the Text layers into this new group. Next, select Group 1, and then reduce the opacity to 70%. Discover how this changes the opacity for all layers inside the group.
To learn more most layer groups, review this tutorial from Adobe.
Merging and flattening layers
If you no longer need to edit sure layers, y'all might consider merging them. There are many reasons y'all might want to combine certain layers. For example, if you have multiple adjustment layers yous might desire to merge them into a single layer before applying other changes, such as sharpening or racket reduction.
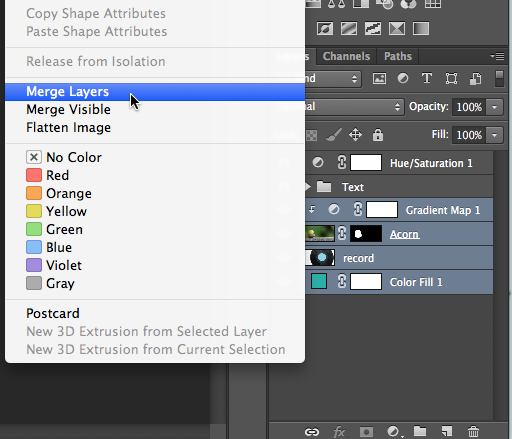
To merge layers, select the first layer, press and concord the Shift key, and click the last layer yous want to merge (all of the layers betwixt the first and last will be selected). Next, right-click the layers and select Merge Layers. Y'all tin can also select the layers and then press Ctrl+E (or Control+E on a Mac).
Merging volition remove the flexibility and control layers provide, so you should only combine layers if y'all're sure y'all no longer need to edit them individually.
Note: Make sure to right-click the layer name, not the layer icon. Otherwise, the bill of fare volition non announced.
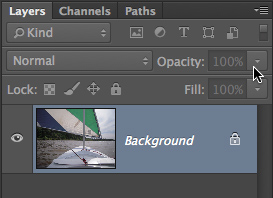
Yous tin can also combine all of the layers in your document into a unmarried Background layer. This is known as flattening the prototype. To exercise this, correct-click whatever layer, so select Flatten Image.
Flattening an paradigm is one fashion to simplify a circuitous Photoshop project. Nonetheless, it'south of import to note that you practise not demand to flatten images earlier exporting them. When saving a project as a JPEG or PNG file, all of the layers volition be flattened automatically because these file formats cannot have multiple layers.
Try this!
Open the example file. Select the Gradient Map and Acorn layers, then merge them.
To larn more well-nigh merging layers, review this video tutorial from Adobe.
/en/photoshopbasics/working-with-brushes/content/
Source: https://edu.gcfglobal.org/en/photoshopbasics/doing-more-with-layers/1/
Posted by: wrighthimered.blogspot.com
0 Response to "How To Make Text Transparent In Photoshop And Retain The Edges"
Post a Comment